Show Your Liver Some Love This Spring
It’s spring cleaning time. You’ve washed the windows, cleaned the closets, tidied up the yard… but what about all the garbage inside your body? Never fear, nature has already created the perfect system to deal with this… and it’s your own liver!
The liver is your body’s most critical detoxification organ. It metabolizes prescription medications, alcohol, pesticides and harmful environmental toxins. On top of this it also produces bile for breaking down fats, helps your body absorb fat-soluble vitamins (vitamin A, D, E & K), is a gate-keeper for abdominal circulation, regulates hormonal imbalances and also builds many of your immune cells. With over 500 different functions happening 24/7, your liver is a hard working organ! So why not give it some loving this year?
Here are some simple things you can do to support liver function and enhance natural detoxification systems:
- Avoid toxins and non-critical medications – Switching to organic fruits, veggies and meats,
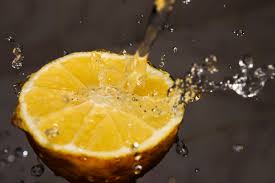
natural shampoos, soaps and cleaning products can drastically reduce the amount of work your liver needs to do to eliminate these harmful chemicals from your body. Soak your fruit and vegetables in a non-toxic fruit and vegetable wash, soak for between 10-30 minutes dependant on the toxicity of the product. See the dirty dozen chart: This year, it is comprised of apples, peaches, nectarines, strawberries, grapes, celery, spinach, sweet bell peppers, cucumbers, cherry tomatoes, imported snap peas and potatoes. - Drink warm lemon water – This alkalinizing beverage not only provides minerals and vitamin C, it also kick starts your liver and digestive organs. Squeeze the juice from half a lemon, add to 1 cup of warm water and drink this first thing in the morning.
- Try an herbal helper like milk thistle – Milk thistle is a potent liver protector and can be
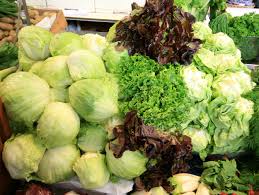
especially useful for protecting and reversing liver damage, often created from excessive alcohol intake or certain medications. It’s also known to stimulate digestion, upregulate detoxification pathways, and regulate female hormonal imbalances. Ask Dr. Rodwin about what kind and how much to take, also to screen for medication interactions as this can be common with many herbs! - Eat your bitters – Bitter foods including kale, swiss chard, dandelion, apple cider vinegar and lemon can be added to help support bile production in the liver. Not only do they do this, but they also contain high levels of the minerals magnesium and zinc, which support detox and metabolism while boosting your energy and immune system.
- But don’t be emotionally bitter! – In Traditional Chinese Medicine, the liver is seen as the
organ system responsible for regulating anger and frustration. Whether you express these emotions too much or not enough, theoretically this could lead to imbalances in other functions that correspond to the liver. Coincidentally in Chinese medicine, spring is the season of the liver! If you’re feeling antsy perhaps it’s time to stock up on lemon water and rapini, maybe you just need to give that tired organ a break!
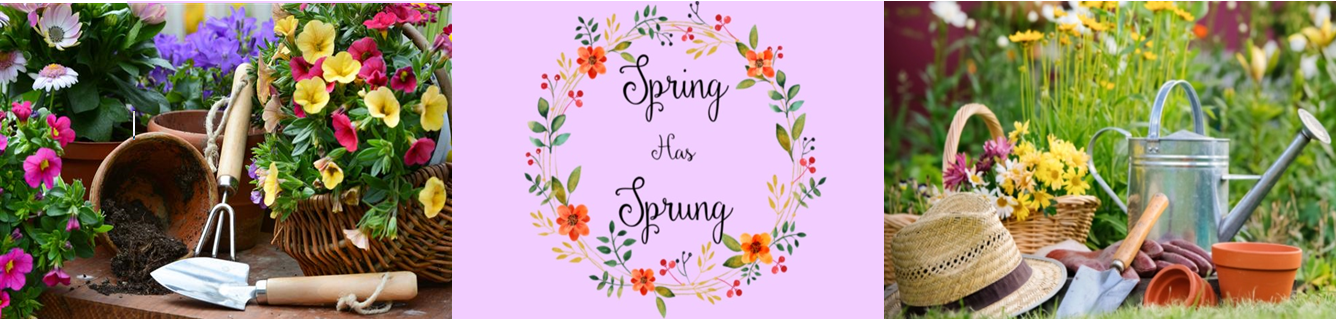
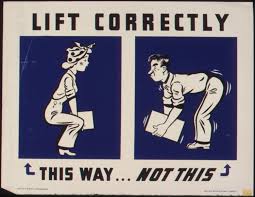
Gardening Ergonomics
It’s important to keep in mind that the most important gardening tool we have is our body. When we begin to hurt, it takes us away from the activity we enjoy so much, so it’s worth the time and effort to learn to garden ergonomically. Proper body positioning, well designed gardening gloves and tools and frequent rest breaks are the keys to being a healthy gardener. There is a common misconception out there that if you just have the right tools for the job you will have no problem getting the job done (and no pain will be experienced as a result). Gardening can be an ergonomic nightmare. Maintaining awkward movements and body positions – such as bending and twisting – for long periods of time eventually can wear out the body and cause discomfort. If you have done any amount of gardening, you have felt it: sore wrists, low back pain, neck pain or just all-around body aches. Gardening should not hurt.
Preparation for Gardening: The Warm-up: You wouldn’t play basketball or softball without warming up, so why would you garden without warming up. Gardening is a very physical activity requiring use of the entire body. Proper preparation is the next facet in injury prevention. Spend 10 minutes doing a warm up.
Neck:
- Keep your work close to you. Minimize reaching. Use long handled tools instead of reaching.
- Maintaining your head and neck in an extended position (looking up) for more than five minutes at a time will create tremendous fatigue.
- If you must work with your arms extended out in front of you, don’t round your shoulders.
- Keep your shoulder blades pulled together.
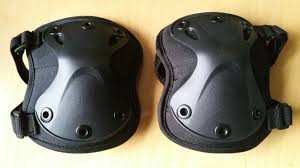
Knees:
- Use knee-pads to protect your knees.
- Ice your knees for 15 minutes after you garden.
Shoulders:
- Work below shoulder level when possible. When that is unavoidable, perform the task for five minutes or less.
- Use both arms whenever possible.
- When it’s necessary to work above shoulder level, perform the task for five minutes or less; then take a break or perform another activity before continuing.
Back:
- Put leaves and garden debris on a canvas tarp and slide along the ground to eliminate lifting.
- Introduce raised beds, containers and trellises – bring the garden closer to you – the closer your garden is to waist level, the less bending and the less strain on your lower back.
- Furrow rows with long PVC pipe cut at a slant on one end; drop seeds through the pipe to plant.
- Alternate sitting and standing positions at 30-minute intervals.
- Keep your work close to you. Minimize reaching. Use long handled tools instead of reaching.
- Digging should be done with intermittent breaks in order for your body to rest from the repetition.
- Bending over for any length of time can very quickly become painful to the lower back and legs.
- Ice your back for 15 minutes after you garden.
Elbows:
- When possible, work with the forearms in a neutral position (i.e. thumbs up).
- Keep the elbows partially bent while gardening, especially when doing resistive activities requiring elbow strength.
- Keep your wrists straight (in line with your forearm) when pushing, pulling and grasping. This decreases the tension on the elbow and wrist.
- Avoid twisting the forearms back and forth on a repetitive basis (example: pulling weeds by twisting the forearm palm up and then palm down). Consider using a weeder.
Wrists (Grip):
- Rules of “thumb”: 1) thumb and forefinger should meet when wrapped around a handle, and 2) indentations in tools should encourage the neutral position (thumb up, wrist straight).
- Work with wrists in a neutral position by avoiding the extremes of motion (up, down, and sideways)
- Hold objects with a light grasp or pinch, avoiding a tight, sustained grip.
- Keep your wrists straight (in line with your forearm) when pushing, pulling and grasping. This decreases the tension on the elbow and wrist.
- Grip strength is at its maximum when the wrist is in a relaxed or “neutral” position. People lose up to 25 percent of their grip strength when their wrist is bent.
- Avoid repetitive pinching and pulling with the finger and thumb.
Gloves:
- Always use gloves. Not only do they protect against cuts,scrapes, chemicals and blisters, they also provide padding.
- Gloves should be made of material appropriate for the specific task (example: gloves for working with chemicals as opposed to gloves for pruning rose bushes or working with the soil).
- Gloves should be form fitting covering the smallest area of the hand possible, without being restrictive.
- Thin gloves are preferable even though they will generally not last as long. Too much padding will decrease the feeling in the hand and decrease hand strength by as much as 30 percent. This decreases overall hand coordination and power grip.
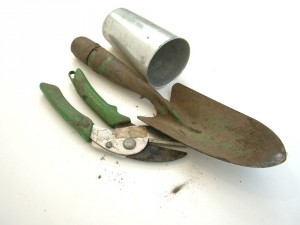
Tools:
- Choose the proper tool for the task at hand.
- Look for ergonomic tools. Just because the tool says it is “ergonomic” does NOT mean it is ergonomic for you! It must fit YOUR body.
- Try out tools before you buy because handle size weight, and length of spindle are all key when it comes to using a tool.
- Telescopic and pistol-grip handles require less energy and keep the body in proper alignment.
- Handle diameter is important. For some people, a fatter handle feels more comfortable at the wrist. However, a fatter handle will fatigue your grip more quickly.
- Look for a depression in the handle for your thumb. This keeps your hand in proper alignment
- Shorter tool handles provide greater leverage control (best for small hand tools).
- Use long-handled tools to reduce strain on your back, knees and hips instead of reaching.
- If tools have wooden or metal handles, consider adding padded tape or pipe insulation foam. You can also modify the grip on your favorite tools. To determine the size of your grip, make a circle with your thumb and index finger. A bicycle grip, baseball tape, foam, and electrical tape all can be used to pad the handle.
- Keep blades sharp and oiled. Dull blades require more force to get the same job done.
- Load tools, supplies, rocks and other heavy items onto a vinyl snow sled; pull it around to work stations. A wheelbarrow is another option.

General Tips:
- Gardening is a source of pleasure and exercise but don’t overdo a session. Plan for breaks and switch tasks often. Move from an intensive task to a light activity after 30 minutes. If you experience pain, stop working.
- Rotate activities. Muscles will typically fatigue in less than a half hour of repetitive activity; therefore, rotate each gardening activity with ones that require different muscle groups and different body positions. Spread the gardening tasks over a number of days versus performing all of them the same day.
- Let your daily physical activity level serve as your guide for how long you can garden. For example, if you are physically active one hour a day, you should be able to garden an hour a day. Even if you do not feel fatigued, take a break for a few minutes each hour.
- Wide garden paths allow for safer walking and favor use of labor saving wheelbarrows, carts and dollies.
- Think about who uses the garden when designing features such as a steps, paths or ponds. Will it include elderly people or young children? A steep drop from one level to another can be an accident waiting to happen. Be careful of uneven surfaces.
- Water weighs more than 8 pounds per gallon; so design your garden with easy access to hoses and water sources. Consider an efficient automated drip or soaker hose system.
- Be sure to drink plenty of water to avoid dehydration while you are gardening.
“Gardening is a source of pleasure and exercise but don’t overdo a session.”
Questions about gardening ergonomics? Ask Dr. Barbara Rodwin
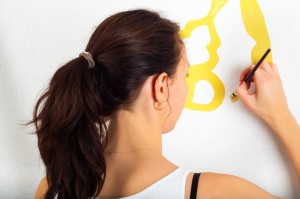
Proper Painting Ergonomics
The house needs a few touch-ups? Don’t forget proper posture when working with your paint brush!
- If painting a ceiling you should place the roller on a broom handle, back up from the task and look ahead and not up!
- When working on low areas squat or kneel instead of bending at the waist. Use a foam pad under your knees and stand up to take a stretch break periodically.
- Painting is a repetitive motion and can put a great deal of strain on your arms, fore-arms and wrists. Take frequent stretch breaks and apply ice if any pain occurs. Alternate between the use of each arm, do not just use the dominant arm to paint as I then see neck, shoulder, and arm and hand issues due to this. When completing the middle of a wall or ceiling use the non-dominant hand as this does not require fine motor movement.
Like with any major household project, don’t try to do it all in a single day. Your body will thank you for it!

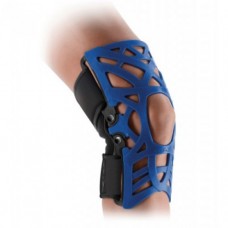
Don Joy Braces Now Available at Back to Health Wellness Centre
IS THE OA REACTION BRACE RIGHT FOR ME?
Have you been diagnosed with arthritis in your knees? This is an everyday solution for arthritic knee pain. The brace gives support for activities like jogging, golf, hiking, tennis or walking. Ask Dr. Rodwin if you would benefit from this type of bracing. It can be worn with or without the material sleeve.
IS THE REACTION WEB KNEE BRACE FOR ME?
This brace is ideal for any athlete or weekend warrior suffering from knee pain. Have you been diagnosed with Patello-femoral syndrome, Chondromalacia patella (runner’s knee), quadriceps or patellar tendonitis, a meniscus injury, Osgood-Schlatter’s disease? Ask Dr. Rodwin if this brace is right for you?

A LIGHTWEIGHT SOLUTION FOR ARTHRITIS KNEE PAIN
The DonJoy OA Nano is a customer favorite because it’s extremely lightweight and it immediately reduces arthritis knee pain. This brace unloads (mechanically shifts weight away from the damaged pare of the knee) so you will enjoy a significant reduction in pain or discomfort with every step you take when wearing this brace. For mild to moderate knee osteoarthritis, the OA Nano is designed for people to stay active and move freely.
One of the best aspects of this braces is it provides people with knee osteoarthritis with
an option to treat their pain and stabilize their knee with a non-invasive, non-addictive
treatment options. Revolutionary in both weight and profile, OA Nano™ offers industry-leading high-tech comfort and pain relief.
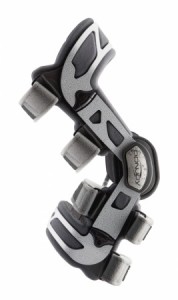
To make this brace lightweight material science collides with innovation to create high-tech functional comfort in a lightweight design. The flexibility of the magnesium frame allows for an intimate fit while the revolutionary nano MAG material provides strength to off-load and provide pain relief.
PRODUCT FEATURES…AND THE BENEFITS YOU’LL EXPERIENCE!
THE WORLD’S LIGHTEST OA KNEE BRACE
At just 14.2 ounces this brace won’t slow you down as you go about your daily activities.
CLINICALLY PROVEN TO REDUCE OA PAIN
DonJoy’s Adjuster technology off-loads (mechanically shifts weight away from the damaged pare of the knee) a little – or a lot.
UNLIMITED COMFORT
The malleable magnesium frame allows you to adjust the cuffs according to your preference.
STAYS IN PLACE
Contoured design enhances brace suspension for various levels of activity
We offer custom fitted braces as well like this DonJoy OA nano for arthritic knees.
Ask Dr. Rodwin if a more custom brace would benefit you!